This guide gives an overview on how to restrict an IAM user’s access to a single S3 bucket.
- Go to http://aws.amazon.com.
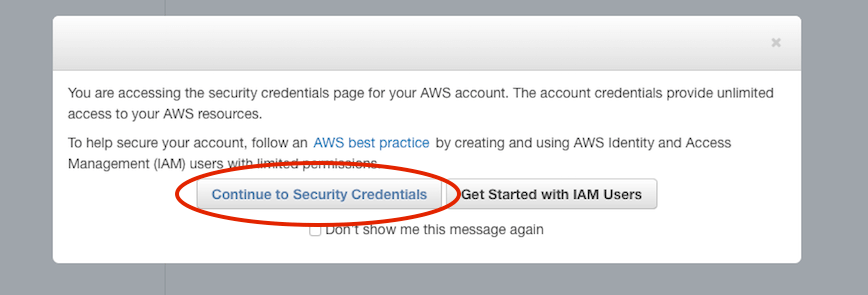
- Click on “My Account/Console” and select “Security Credentials”.

- Select “Continue to Security Credentials”.
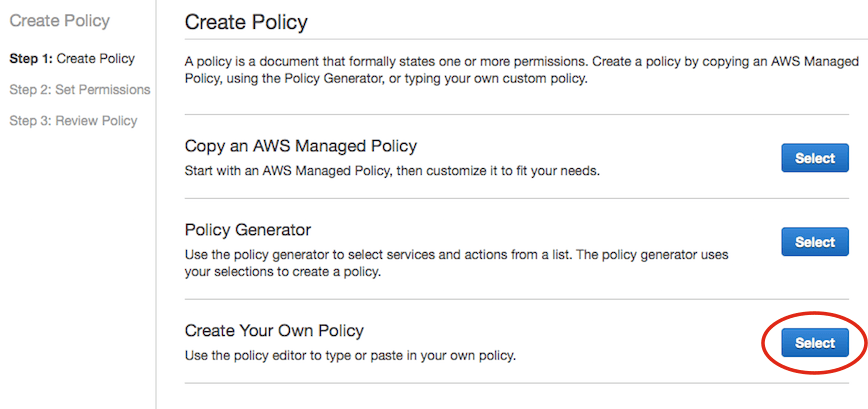
- Select “Policies” on the left menu, then click “Create Policy”.
- Select “Create Your Own Policy”.
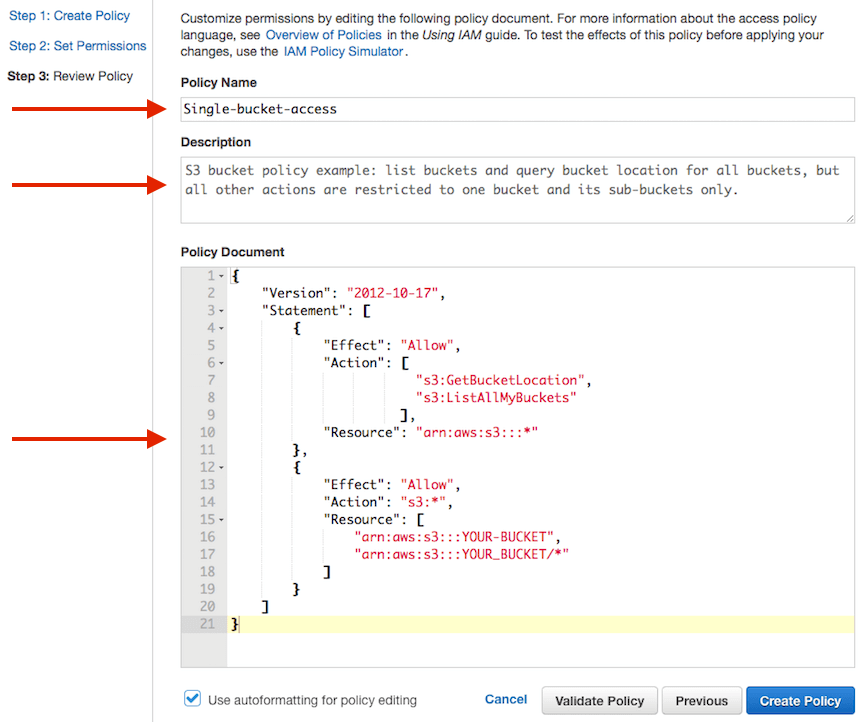
- Fill out the “Policy Name”, “Description” and “Policy Document” fields.
Replace “YOUR-BUCKET” in the example below with your bucket name.Note: The
"s3:ListAllMyBuckets"is used to list all buckets owned by you, so that tools that list buckets will work.
The"s3:GetBucketLocation"is needed so that ObjectiveFS can select the right S3 endpoint to talk with.Example policy:
{ "Version": "2012-10-17", "Statement": [ { "Effect": "Allow", "Action": [ "s3:GetBucketLocation", "s3:ListAllMyBuckets" ], "Resource": "arn:aws:s3:::*" }, { "Effect": "Allow", "Action": "s3:*", "Resource": [ "arn:aws:s3:::YOUR-BUCKET", "arn:aws:s3:::YOUR-BUCKET/*" ] } ] } - Your new policy is created after you click “Create Policy”.
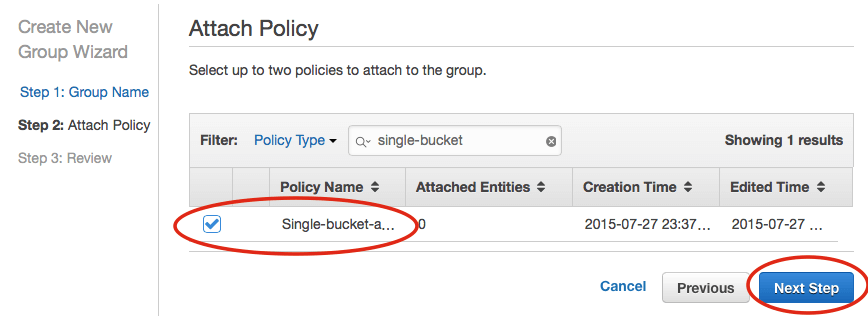
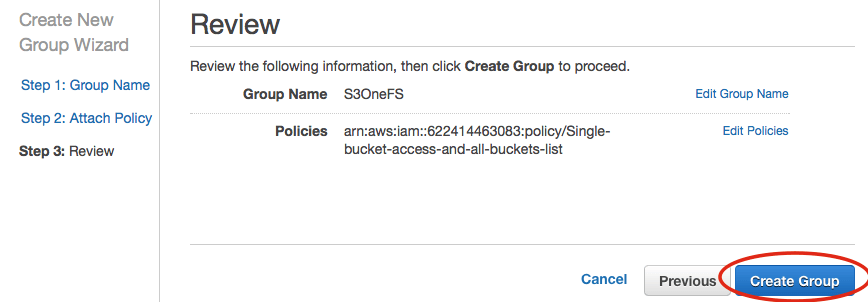
- Select “Groups” on the left hand menu bar, and click on “Create New Group”.
- Enter a group name, e.g.
S3OneFS. - Search for the policy name that you just created, e.g.
single-bucket-access-and-all-buckets-list - Next, select “Create Group”.
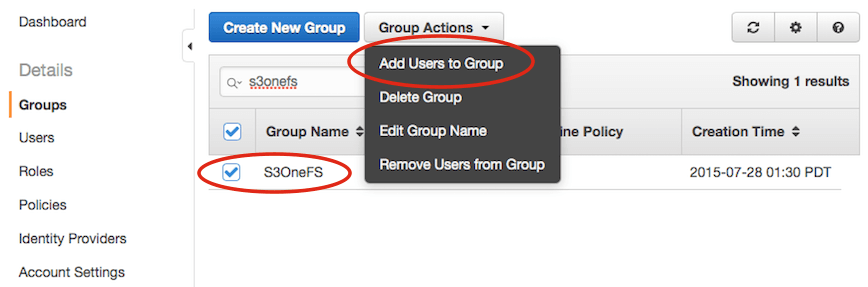
- Select the group that you just created, e.g.
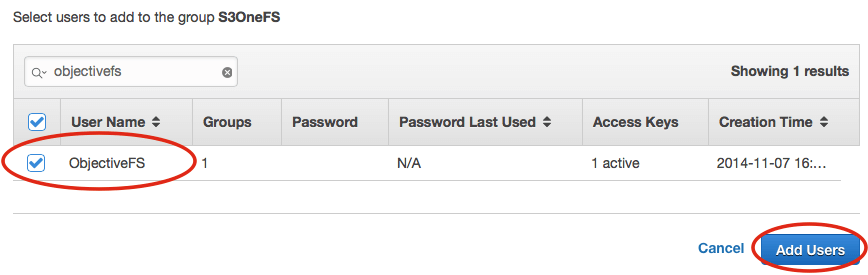
S3OneFS, and click “Group Actions”. Select “Add Users to Group”. - Then, select your user, e.g.
ObjectiveFS, and click “Add Users”. - You can now use your “Access Key ID” and “Secret Access Key” to run ObjectiveFS restricted to a single bucket.


by ObjectiveFS staff, July 28, 2015
ObjectiveFS is a shared file system for OS X and Linux that automatically scales and gives you scalable cloud storage. If you have questions or article idea suggestions, please email us at support@objectivefs.com